Showing posts with label planning. Show all posts

Tuesday, January 26, 2016

Garden Planning

Like so many, this time of year I get lost in my seed catalogues. I've a wonderful 'seed bank' of seeds to select what I want to plant, and will get more serious about seed saving this year, but I still enjoy haunting my catalogues. I use largely Heirloom, and always Non-GMO seeds and plants, so seed saving will be easily done for healthy plants next year. I've always saved my bean seeds...yellow/wax, Dragon Tongue, and green, as well as a few odd ones I experiment with from time to time, but want to get more organized and spot on saving all the others, too.

I'll be choosing which two fruit trees I want to plant this year, too. I'm thinking the apples first. Because the soil is so nutrient deficient, the holes have to be a LOT larger in order to mix in soil amendments. I also have a thick layer of sandstone under my top layer of soil. Depth varies, so I'll have to deal with that issue, too. I'm thinking about Gala, Granny Smith, and Red Delicious. Will choose two from the three, or...hell...may do all three! I'll do Dwarf trees, not because I don't have space available for a full size tree, but because the shorter/smaller trees will be easier for me to care for and pick fruits.

So, I've selected some seeds to start...most I've planted in previous years, and some are experimental. I like to try different things with different seeds to see how best to utilize them for the growing season. Up here? The growing season is really short, so I'm going to try starting and transplanting a couple of things that I wouldn't normally do that with this year. I keep detailed notes that include soil mix, dates seeds are planted/sprout, where the trays are inside, transplant dates, etc. So I know/learn what works, and what doesn't.
 
Some seeds I'll be starting inside in the next couple of days.
Seeds to start soon.


More seeds to start soon.
Although I know it's a tad early, I'll be starting my plants inside soon. I want good-sized plants to transplant when the weather permits. I'm uncertain when that'll be...lol...according to some of the planting sites I've looked at, it won't be till June, but I always get things out earlier than dates given...so, we'll see how that goes.
Garden plan
Garden plan


I've always done a lot of planning like the drawings above because it helps me to have something visual to use as a starting point. Notes...notes...notes! I can't rely on my memory...lol...that's for sure.

So, I'll be planting around the shed where I have a nice area to work a smallish garden that has decent sun exposure with some shade for the hotter months. I was going to work my soil mix into the existing soil, but have decided to do raised beds like I had in Illinois. The soil here is extremely poor, and this won't be my permanent garden area...just for the next couple years. So it makes sense to work with raised beds for now. I'll be building up with largish rocks, which are plentiful around here, and some larger dead fall logs...inexpensive (free, as a matter of fact), and using what I have at hand. Of course, I'll have to fence it in...rabbits...elk...etc...would have a field day destroying anything I plant otherwise. I've quite a few T-posts laying around, and the always available chicken wire, too. I'll probably have to get another roll of chicken wire, but there's always a use for that somewhere.
I'll do something like this for the rain catchment set up. Image from www.ecodiy.org

I'll be setting up a couple of IBC totes, along with guttering on the shed to do rain collection. That's how I'll do some watering in the garden. I'll have around 600 gallons for use, so hopefully that'll get me through 'some' of the dry months here. I'm hoping the short monsoons will keep it replenished. Though the monsoon season rains aren't usually enough to water a garden deeply, I'm hoping they'll keep this rain catchment topped off for the deep watering needed.

Funny...I'm finding that to be true for many things...finding a use for 'that' somewhere. Like...I buy kitty litter in those large plastic containers. I've given a lot of them to friends up here for their use, but I found that they're great to use for my chicken feed and scratch. I keep the bulk (several bags of each) in aluminum garbage cans to keep mice out, then refill the empty kitty litter containers with manageable amounts to carry to the chickens. I can think of more gardening uses for these kitty litter containers already! Recycling at its finest. I imagine I'll do that a lot with many items over time.

Thanks for reading...ciao!


Monday, October 26, 2015

Realities of tiny house living

I bought my property about 2 years ago now, and moved up here this May. I decided to build my guest cabin first so that I could spend some time observing the property during the seasons in order to develop the property responsibly. The property is sloped...goes from 7200' elevation to 7400' elevation bottom to top. So there are some run off issues that have to be dealt with using trenches and berms. So far, my driveway onto the property has held up pretty well, and we've had a few sustained, heavy rains up here. I'm fairly confident that it will do fine in the long run, however, I'll have some gravel brought in when all the heavy equipment work is completed.

The guest cabin is a Weather King cabin shell...side porch model...12' x 24', which is 288 sq. ft. total. Taking off the 4' x 8 ' porch from inside measurements comes out to about a 256 sq. ft. living space. I did two upgrades to the build: 2" x 6" walls (for better insulating), 2 extra windows...double paned...again, for better energy efficiency. There is no loft (I don't like the look of the loft style, and I'm too old to be climbing up and down ladders in the middle of the night!), so this cabin is limited to the actual floor space.

Moving the cabin onto my property.
The cabin in its permanent place.
Rough insides with initial move-in.
The curtained area is the bath area with the kitchen to the left. The handsome fella is my almost 14 yr. old GrandBoy.
Initial kitchen area.
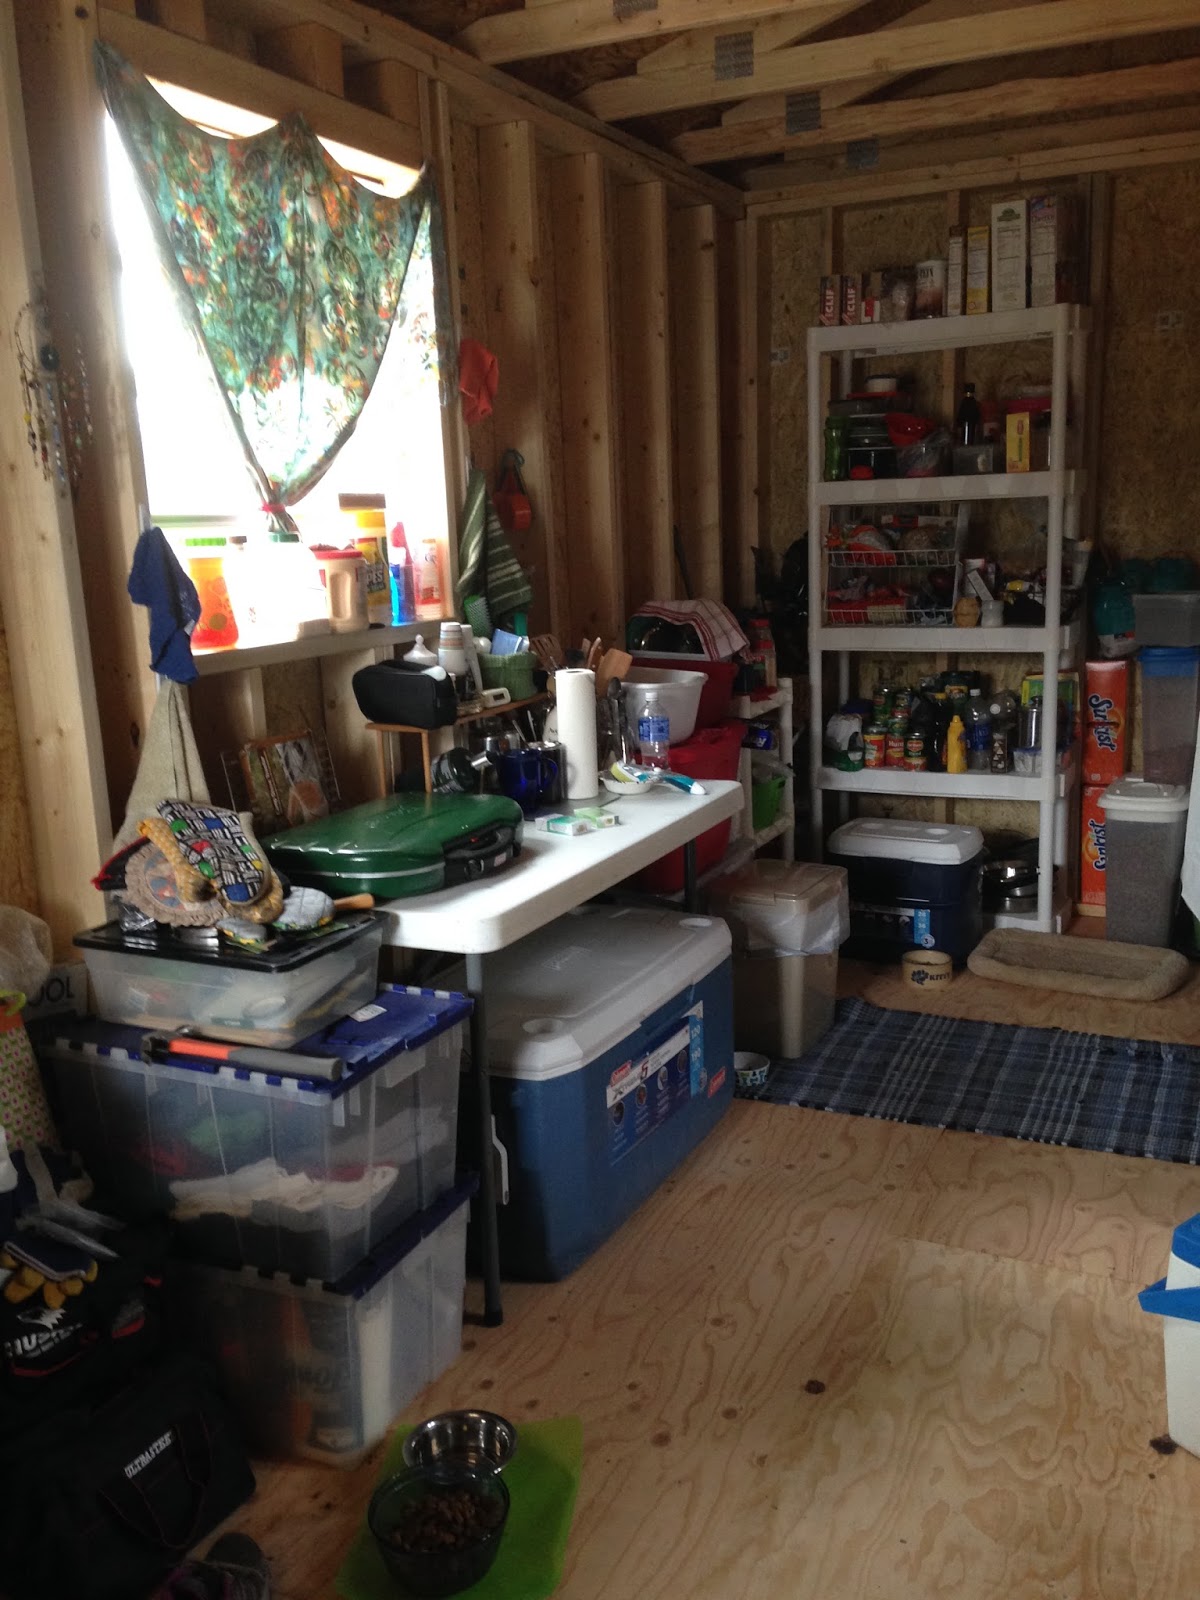
For short periods of time, guests will be fine. For me, my 3 yr. old German Shepherd Gracie, and 3 cats, the space is definitely tight...particularly in the kitchen area when they all want to be under foot! The reality of living in such a small space with animals is quite a challenge. Paring down belongings isn't so difficult, but walking around can be tricky at times. Scary even!
KiKi (left) and Tippy (right)
Gracie
Tippy and Bandito (top)
The fine art of learning to share!
The finer art of learning to share!

I'll have to be creative in storage options while living in this cabin once it's completed...nearly there. Built in shelves will make a world of difference. The insulation, wiring, plumbing, and dry wall are completed, though I still need to drywall mud the screws and mud/tape the seams...then paint. I'll have a small wood stove installed, and have already had the fire-roc installed where it will be placed...along with spacers, and some kind of stone/brick backing and floor. Basically, I'm winter ready except for the wood stove. That's on hold for now, and I'm using one of those oil-filled radiator heaters when needed to take the chill off.
Small toaster oven, 800 watt microwave, 2-burner cast iron top electric stove, electric kettle, and my favorite secondhand find for storage.
Tiny, compact refrigerator (a problem as I like to cook/bake, and store the leftovers). There won't be a door on the bathroom...takes up too much floor space. I'll hang a nice curtain there when the painting is all done.
Temporary storage. This corner is where the small wood stove will be placed.
Sleeping area. Bed is a wooden futon frame that turns into a couch. However, I simply leave it down as a bed.

Let there be light! Great sale find at Home Depot...porch light cost was only about $13.
Insulation in the walls is R19...ceiling is R30. I wanted it to be comfortable winter and summer...coldest and hottest times of year. Finding a small wood stove that won't break the bank (this is, ultimately, my guest cabin...not my permanent house) has been difficult, but I think I found one.

Anyway...for me? The real challenge is moving around a small space with my animals. I've stepped on more tails than I care to count! Gracie has to be involved in every move I make...so she challenges me at every turn. I can manage storage...that'll be the easy part. Living in a small space with my critters? Not so easy at times.

Ciao

Friday, October 23, 2015

Rain, rain go away!

It's been rainy since last weekend. Aside from making a mess of the main road out of here, my driveway (around 300' or so) is a mud pit, and going anywhere is a tad...well...not safe (nearly slid off the side of the road down the hill), I can't work outside finishing up the hen house and run. I really don't have much more to do: cover roof with tar paper, edge with flashing, then put the roof on...easy peasy. The run already has the posts cemented in place, so all I need to do is put up the chicken wire, and fashion a simple gate into the run. I've decided to wait till Spring to whitewash the inside. I'm running out of time before 'real' winter weather hits.

My friend and I went to Albuquerque for a play day hittin' second hand stores, and to pick up more chicks. She found a lady in Albuquerque who breeds chicks all year long...has quite the set up there. Rose got 6 Buff Orpingtons, and I got 2 Buffs and one black Australorp. They're all 3 weeks old now, so Rose is keeping them in her house in my dogs old wire kennel. All 9 chicks fit just fine, and are growing fast...feathering out already. We're feeding non-GMO feed, fresh fruit/veggie scraps, and baby chick grit. They're flourishing! Sooooo...I need the room for them to all roam once they can be put outside. I know it'll be awhile just yet, but I need them secure for the winter. Next time I run up to Rose's, I'll snap some pics and post them.

Been going to doctor appointments this and last week...just establishing myself as a patient, but have some tests coming up that will put me away from home for a day here and there. The dreaded colonoscopy is one of them. Now...how does that relate to homesteading, alternative living, etc? Well...colonoscopy prep is just plain nasty...a thorough colon clean out. You get my drift? Well, I have a very simple composting toilet system...chuckles...a 5 gallon bucket with a toilet seat using coco-coir (coconut fibers).
The toilet is in the corner with white bucket next to it containing the coco-coir.
 I started off using sawdust but stopped when I found a Child of the Earth bug in my sawdust. They're not poisonous, but can make a stink, and give a nasty, painful bite. Yeah...not goin' there...thank you very much.

I'm telling you...the head on this thing was nearly the size of a small marble! I'm not having anything like that near my bum...lemme tell ya! One of my former students is off grid using a composting toilet, and he told me about the coco-coir...ordered...been using for a few weeks now. It's not quite as good at masking odors as the sawdust, but does the job well enough.

Anyway...using my little composting set up while doing the prep for the colonoscopy isn't ideal by any stretch of the imagination. I'll probably stay at the Bunkhouse, which has running water, regular toilet, etc. It'll be easier to deal with the prep that needs to be done.

I'm older than probably most people doing what I'm doing. I'll be 57 yrs. old next month, so I'll be dealing with things like this that the younger homesteaders aren't dealing with when using alternative systems within their homes. And...I'm single...so am doing this by myself as well. I also have some health issues that need to be considered.
Me (left) with my sisters...Middle sister, Jeanette, in the middle...Baby sis, Niecey, on the right.

Me...hosing down the GrandBabies :) in my Ma's front yard.
I'll be honest...I didn't think about this type of situation during my planning. I did consider the health issues, but didn't think a composting toilet would be an issue. Unfortunately, it is. As a result, I've decided to put in a simple septic system with a low flow toilet. Though this is my guest cabin, I'll be living in it till either next Spring or Spring 2017. It will cost less money to do this than to install a quality composting toilet, and finances are critical at this point...so have to be considered. I also had to consider guests, and their ability/willingness to deal with a composting toilet system responsibly, and the fact that my son and his family will eventually inhabit this cabin during visits...6 people using a composting toilet would be a nightmare.

Is this a compromise I'm comfortable with when considering earth friendly concerns? Yes and no. Yes, because it's more practical given my age, health issues, and guests who'll be staying in this cabin. No, because I'm not so clear on the long term consequences to the soil when one uses a septic system...even a simple, smaller one.

So...learning, learning, learning. I'm still waiting for the well driller to install my well pump, and have called several others for estimates. I'm fairly certain that it won't get done before winter hits hard...probably not till next Spring. It's all good...frustrating at times...tedious at others (particularly with dishwashing and showers), but doable none-the-less. All part of the process...yes?

Ciao


Friday, October 2, 2015

Hen House II

So...my son and I built the hen house, and I've been working on finishing it. I got really sick with bronchitis and a sinus infection...put me down for a couple weeks, so I've been playing catch up with work on the coop.

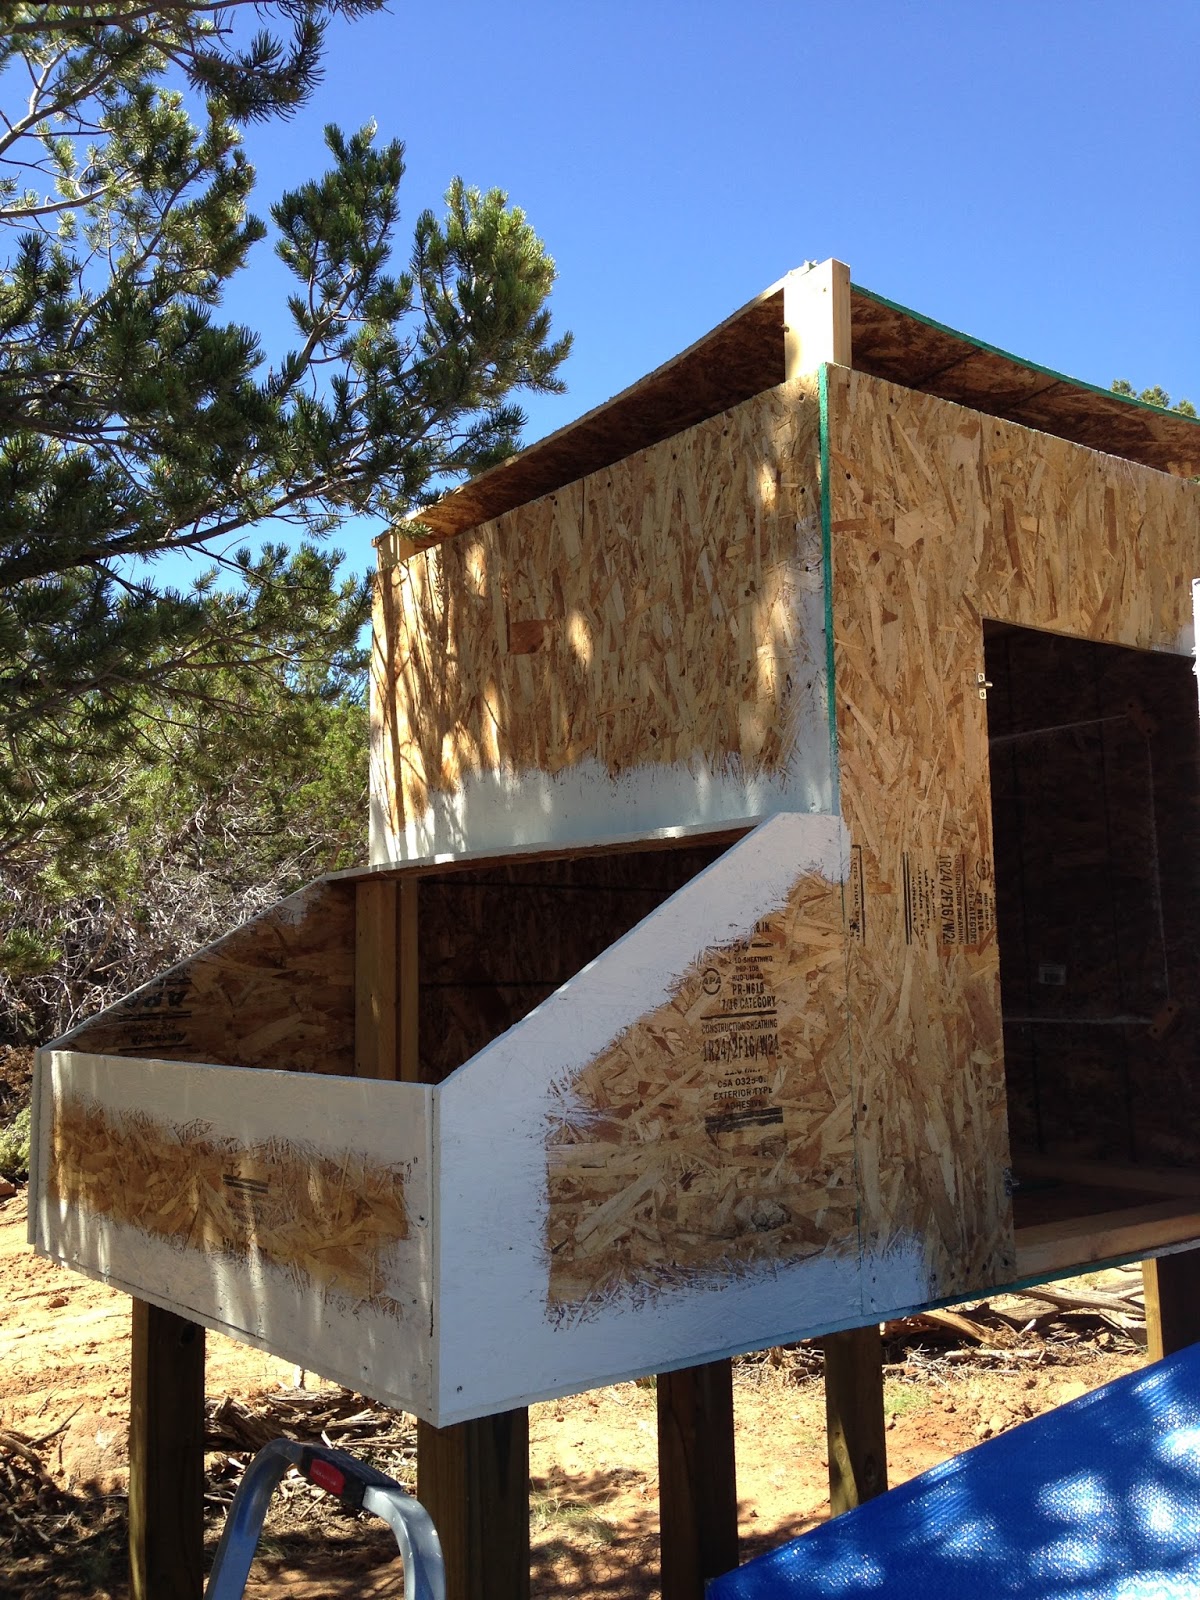
I used an oil based Kilz on it to protect the wood. That stuff is amazing! Dried, it left a sort of rubbery textured coating on the outside walls.
Trim and edging completed.

Trim and edging.

All done!
Kilz all done.
Time to add the color! My daughter in law, Dia, decided it should be turquoise...so...turquoise it is!
Trim and didn't need to edge as the roller covered that beautifully.

Coop painted!

Window covering and lid to nest boxes. It'll be roofed with the roofing material, so isn't completely painted...just edged.

All done...ready to apply wire at the top around the vent area.
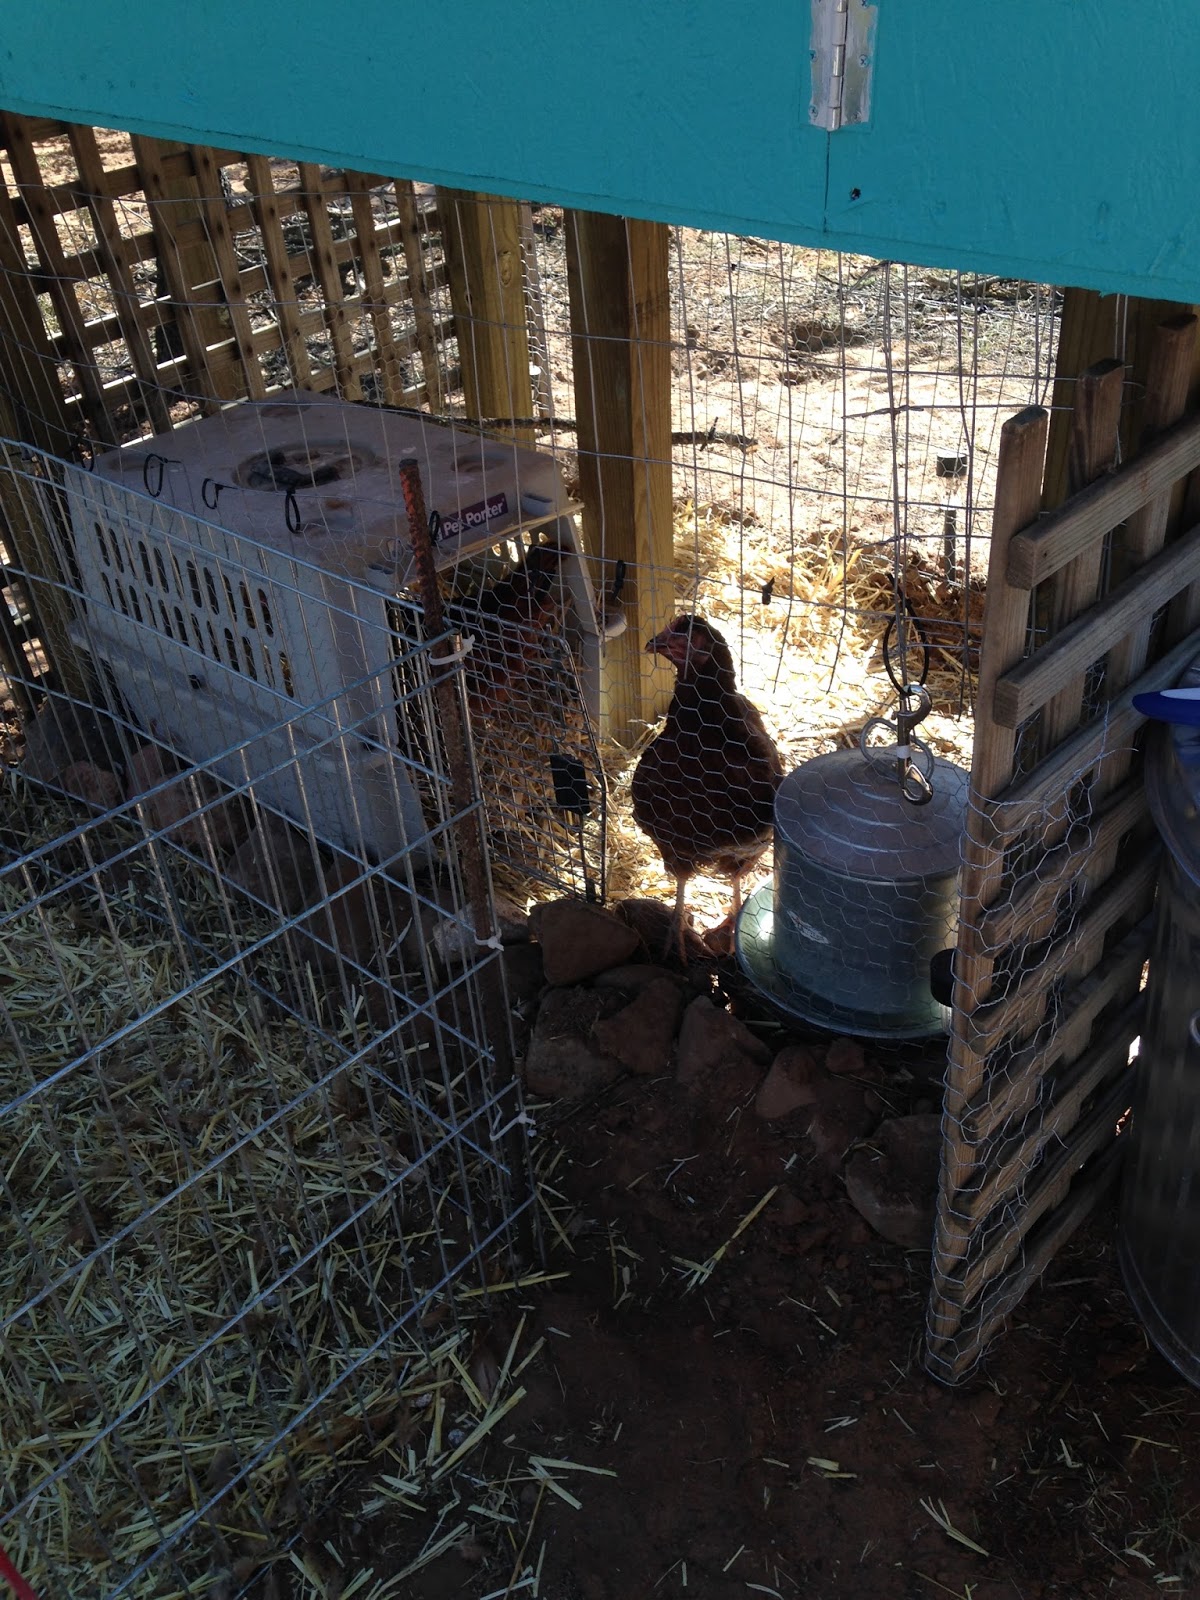
 So...the blue tarped structure in front of the hen house is/was the chicks temporary structure. I used things on hand to set it up in June...a large dog enclosure surrounded with chicken wire buried about a foot to stop digging predators, chicken wire across the top, and tarped for shade. I placed a smallish pet carrier inside for some type of housing for the two hens, and space for them and their food and water.

Well...it was seriously in the way while all of this work was being completed...so I took a day to enclose underneath the coop. Moving the chicks was the most difficult part...lol...the larger one is a tad aggressive...snot! But they were moved so I could take down the initial temporary structure, and finish work on their permanent home.
Chicks under the coop.

Enclosure under coop.

Happy chickies!

Tarped construction taken apart and straw placed in compost.
I decided that I need to get some flashing, roofing paper, and canned insulation before putting the roof on top. Have to drive 2 hrs to closest Home Depot or Lowe's, and haven't had a chance to do that just yet...maybe this weekend. Once that's acquired and in place, I can put roof on top of coop, whitewash (I found a simple, safe lime wash to use) the inside. It has to be secure from rain/snow before I whitewash...so...figuring out when to do each step is critical. Then I can enclose the run, and cut the chicks loose.

Currently, I only have the two Rhode Island Reds...my first...*whispers* I don't like them. I got three of them the end of May, but lost one of the chicks early on. I prefer Wyandottes, Buff Orpingtons, and Australorps. I'll acquire some pullets this month...once the run is completed, and a few more next Spring.

I've been feeding them a non-GMO feed, and I have to say these are the healthiest chickens I've ever had!

Thanks for reading...

Ciao

Tuesday, September 29, 2015

Chicken Coop

When my son and his family came for a visit in August, they gifted me with work days...asking what I wanted done. lol...Really? Anything at all, they replied. Really? lol...Ok then. I want to build my hen house, line the drive with stones (tons and tons all around the property), and have a trench dug on one side of top drive area.

We worked our butts off, and man, oh man did they kick it! Tommy and I (with some help from dil Dia) built the hen house. It's very similar to the one I had in Illinois, but on a larger scale.
 
My handsome son getting ready to cut the wood.
We worked all of one day, and part of another to do all this, but it got done! They literally saved me...easily?...a month or more of work doing it all by myself. Needless to say, I was thrilled, and beyond grateful for their help.

Prep work: I dug the holes, and Tommy and I cemented the the 4"x4" base posts in place.

Beginning building the coop on stilts!

Tommy adding walls to the coop.

The finished coop with temp chick quarters in front (covered by tarp).
I have some water run-off issues when it rains. Mostly it's pretty minor, but with a 200' slope top to bottom of my property, there are bound to be a few problem areas. The driveway is one of those areas. So, I'm hoping the stones, and trenches dug here will help with some of that as it crosses the driveway.
Beautiful job lining part of the drive with stones...kind of between upper and lower drive areas.

More stone work!

Thankfully, I have a LOT of stones on my property!

At the curve on lower half of drive.

Upper drive trench.

We all worked hard, and got a lot done. Even my 3 yr. old GrandBoy dug trenches (aka holes), and moved rocks! The kids were troopers!
A restful moment in the shade.

Chillin'.

 It was a fun day.

Ciao